

Make a stylish ottoman
An ottoman can be an attractive focal point in the layout of your lounge. Clifford Roberts and Andries Eygelaar demonstrate how to make one.
Materials
SA pine planks
Two pieces of fabric
Uncovered buttons
A zinc washtub
Sponge foam
General contact adhesive
A handful of tacks and nylon thread.
Tools
Staple gun
Industrial needle
Hammer
Tape measure
Jigsaw
G-clamps
Fabric scissors
Project guide
Difficulty: Intermediate
Estimated time: Weekend
Cost: R400
An ottoman is a classic piece of furniture that has been a feature of sitting rooms for centuries. More than simply a stumpy footstool, the ottoman is often a centrepiece that repeatedly features in décor magazines. Our objective was to make an ottoman in the current popular style.
Combining the environmentally responsible philosophy of recycling and latest fashion trends, our ottoman resembles one that comes straight from the pages of a glossy magazine.
It uses an old zinc washtub reinvented as the base topped off with a neatly upholstered board. The result is not only an aesthetically pleasing piece of furniture, but there is also a handy storage space inside the washtub itself.
Handy tips
• No matter what you say, people will forever be putting their feet up on the ottoman. Extend its life by scotch guarding the surface.
• To prevent the ottoman from scratching the floor, attach four wooden blocks lined with old carpeting to the underside of the washtub.
• If your upholstery efforts result in unsightly folds along the edges, glue French ribbon or ribbing around the seat.
The pleasurable thing about this project is that it makes use of a variety of techniques. Some woodwork is required to create the seat while the upholstery involves the making of the buttons and working with fabric and foam.
Step 1: Start the project by making sure you have the right tools and materials. Zinc washtubs can be purchased new. Older versions can still be bought from second-hand goods stores. For the seat, we laminated some 22mm SA pine planks we had lying about the workshop.
An easier method would be to measure the circumference of the washtub and simply purchase the required size from your timber store. From a sponge foam stockist, buy a firm slab about 40mm thick and wide enough to cover the widest diameter of your washtub.
You’ll also need uncovered buttons, which can be purchased at fabric or craft stores. The number and size of buttons and the size of the fabric you use will be determined by the size of your washtub and the particular design you have in mind. The fabric store is also the place to get strong nylon thread, which will be used to attach the buttons.
Step 2: Having traced the diameter of the washtub on the plank, we used a jigsaw to cut the exact shape, including an indent on either side where the handles of the tub are situated. The plank should sit on top of the washtub rather than inside the lip.
Step 3: Next, determine the number and locations of your buttons for the final assembly. This step may vary according to the size of the tub you are using as well as the look you require.
In our case, we drew a line across the centre of the board, between the widest points of the seat, to divide it exactly in half. Then we measured 60mm from the outside of the board and drew another line all the way around, following the edge. At the widest point between the centre and outer lines, we ascertained the halfway mark. This served as the guide for our third line to run evenly between the other two, around the board.
The result was a straight centre line and two oval shaped lines following the edge of the board. It was along these lines that we plotted locations for our buttons, spacing the marks as evenly and aesthetically as possible. The more buttons you have, the longer the project takes. We used 29.
Step 4: Drill through each marked buttonhole, making sure it’s wide enough to take the thread for the button. Use a carving bit to smooth away the edges of the hole to prevent the thread being chafed through over time.
Step 5: The next step is to cut and attach the foam to the wood cover. Place them on top of each other and trim the foam exactly to size. Sponge foam can be tricky to cut – we found a conventional, two-blade electric carving knife from the kitchen ideal for the job.
When attaching the foam, the following technique is essential to giving a well-rounded shape to the cushion. Lift a portion of the sponge foam where you’ll be applying glue slightly off the underlying wood surface by sliding a dowel or something similar between the two materials.
Work systematically and run a line of general contact adhesive along the top edge of the sponge foam and along the edge of the wood.
Step 6: After a couple of minutes, when the glue becomes sticky, fold the glue edge of the foam over the glue-less portion, to meet the glue on the wood. Take it slowly and you’ll be sure of a smooth, neat and rounded edge to your cushion.
Step 7: To attach the fabric, spread it on a clean workbench with the print on the underside. Lay the seat onto it, sponge side down. Trace a line around the seat onto the fabric about 60mm outside the edge and cut.
Fold one edge of the fabric onto the board and anchor it by pegging it with a few upholstery tacks, which you will eventually remove. Now take the overlapped fabric on the opposite side of the board and fold it over firmly, but not too tightly. Fix it to the board using the staples – work your way all the way around.
Keep checking that the fabric covering the surface of the cushion is taut and smooth. Trim away excess fabric along the stapled edge and staple down any loose folds.
Step 8: Now, set the washtub and seat aside to make the buttons. Making a button is a relatively simple procedure and even easier, we found, if you have the right tools. These tools can be assembled in most workshops. Essentially, you require a small block of scrap wood with an indent in which the button head can comfortably lie. Fix the block to your workbench using the G-clamp.
Step 9: Next, take an offcut of the fabric you’ve chosen for the upholstery and on the underside, using a suitably round object, draw circles roughly double the diameter of the button. Our buttons were 22mm wide, so we used an old plastic tablet canister of 40mm in width to draw the circles.
Place one fabric wheel in the indent of the wood, followed by the button head. Fold the fabric over the button head. A thick needle can help; the work can be finicky at first. Then slot the button plate over the exposed button loop and secure firmly into place.
We devised an easy way of doing this by using a short piece of 20mm plastic pipe, which fitted squarely around the edge of the button plate and allowed us to tap it firmly into position with a hammer.
We then threaded each button with about 220mm of nylon (we used about 7m in total). The head of the industrial needle is fed through the buttonhole in the wood, pushed through the foam and fabric until the head shows on the other side, and without removing it completely, threaded.
Draw the needle back and while gently pushing the button into the cushion on the underside, secure the threads by stapling them down.
Step 10: Once they’re all in place, take your second piece of fabric – we used an offcut from an old bed sheet – and staple around the underside of the washtub cover to round it off.
To finish the project and ensure the seat doesn’t shift around on top of the washtub, take four small blocks of wood trimmed with an angle and screw them to the underside of the seat, two at either end. The final product will be an item of joy for years to come – plus, you’ll be able to say you made the fashionable item completely by yourself.

Your new ottoman

Use a jigsaw to cut the wood to fit the washtub.

An old zinc washtub is transformed in this project.

The washtub cover will need to sit on top of the washtub.

You’ll need to cut the cover to accommodate the tub handles.

Once you’ve plotted the location of the buttonholes, drill the holes.

As part of your button-covering equipment, a small indent in the wood will keep the button from moving around as you work with it.

We used a pill container to mark the fabric that would cover the buttons.

Place fabric over the indent, followed by the button head.
Carefully fold the fabric into the button.

Slip on the button plate, making sure the lip that will lock it in position is faced inward.

We devised a nifty way to lock the final assembly using a scrap piece of plastic pipe.

A two-blade electric carving knife from the kitchen is ideal for cutting sponge foam.

Place glue on the upper edge of the foam as well as the outside edge of the plank.

Fold glue on the foam to meet the foam on the wood and press down.

Use a carving bit to round off the buttonholes and prevent chafing of the thread.

When you’re ready to start upholstering, anchor the fabric using a few upholstery tacks.

Staple the fabric to the wood. Work systematically and neatly.

The covered seat should be smooth and free of folds in the fabric.

When you thread a button through the seat, make sure the ends are stapled firmly. We used a hammer to tap the staples to ensure a firm grip.
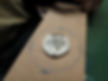
To achieve a good finish, depress the buttons evenly as you go.

Add four blocks to the bottom of the cover to prevent it from shifting around.
