

A simple kitchen update
My younger son recently moved into a new townhouse. There had been a fire in the kitchen prior to his purchase and the kitchen had been recently gutted and refitted. It was a nice new kitchen, but there were three items he was unhappy about and Dad was called in to rectify them
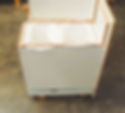
There was a pull-out unit next to the oven (photo 1) that had back-to-back spice racks. My son is not a gourmet cook and doesn’t need storage for 30 different spices. In fact, he only needs storage for three. There was also a pull-out unit next to the fridge (photo 2) that was useless. It had probably held a plastic refuse bin, but a bin was nowhere to be found. The real problem was not a missing bin, but one of poor design. Whoever designed the kitchen had forgotten their high school physics. The front of the unit is a class 2 lever and the mechanical advantage is at least 4-to-1. It was not surprising to find that the joint between the tall front (720mm) and the shallow tray (100mm) was already showing signs of failure and the front was tilting outward. This design flaw had to be rectified before we could start thinking about some sort of refuse bin. The third problem was that there was nowhere to store trays.
I had quite a bit of 16mm white melamine over from a previous job, however none of the offcuts were edged. They could have been taken to a board centre to be edged, but I prefer to do my own edging with 6mm hardwood strips. I learnt a long time ago that it is almost impossible to line up and glue edging that is cut to the exact width. I cut the edging 2mm oversize (18mm for this job) and trimmed it after attachment with a router. The techniques are documented in the February 2010 issue of The Home Handyman magazine in my ‘Router round-up’ article. Photo 3 (in this article) shows the router table set-up I use for trimming the edging. I also had some 18mm x 6mm rosewood edging over from a previous job and as it was a good colour and grain match to the veneer in my son’s kitchen, it was used to edge the five pieces of melamine needed for my upgrade.
The two problems of excess spice storage and no tray storage had a simple solution: Remove the one plastic spice rack fitting and modify that half of the pull-out to provide a narrow but deep space. All that was needed (as is shown in photo 4) were two pieces of edged melamine and nine chipboard screws. These were screwed directly to the existing unit. In retrospect, I could have edged the back edge of the larger of the two pieces of melamine. Photo 5 shows the modified pull-out drawer back in the kitchen. My son still has storage for some 15 spice bottles (more than he will ever need) plus storage for his trays and cutting boards.
Our kitchen refuse bin is a circular metal container that takes a standard size plastic liner. The container is attached to the inside of a door underneath a sink unit. I borrowed two of the liners and after some experimentation came up with the result shown in photo 6. I built a melamine container using three pieces of edged material. This was large enough to take two standard bin liners. It also solved the initial problem of poor design mentioned earlier. You can now yank the handle without putting undue stress on any part of the unit.
Pointed dowels solved the problem of holding the liners in place. These are shown in close-up in photo 7. The plastic liner is simply pushed over four dowel points and then held in place by two cover strips. These were made from the same strips I had used for edging. The points on the dowels were sanded on my belt sander using the simple jig shown in photo 8. The result is shown in photo 9: What was a useless pull-out drawer now provides two refuse containers.
This project again reminded me that kitchen cabinet work does not require fancy joinery. Butt joints held together with screws are all that is needed. I use 45mm x 4.5mm chipboard screws. Although the screw manufacturers claim it is not necessary, I still drill a 2mm pilot hole; the screw then goes where I want it to go, not where it wants to go. At the time the photos for this article were taken, I had run out of white screw head covers. The screwed construction is thus obvious in
my photos. The screw heads have since been capped.

Double spice rack

Not all that useful

Router table set-up

Tray storage construction

Tray storage complete and in use
Refuse unit design

Pointed dowel detail

Jig to point dowels

Refuse unit complete and in use
