

Creating an island
Andries Marais, an avid reader of The Home Handyman, set out to build a modular kitchen cupboard and decided to share his experience
Our kitchen has a large floor area and we wanted to increase the work surface. We decided to include a small island work area.
The requirements were easy to me. We wanted a cupboard with a granite top and the work area had to be 30mm lower than the current work areas.
The existing kitchen has kiaat cupboards with Formica tops. I had worked with kiaat before and it was therefore easy to accept the challenge, although kiaat wood was difficult to get hold of during 2013 because of a moratorium on the cut and distribution of this type of wood; I could not always find the sizes I needed.
This project was unique in that only one size of wood was used. Twenty-four pieces of 900mm long x 60mm wide x 20mm thick was the standard dimension ordered from the supplier. * The complete structure of the island cupboard was built using one size.* The legs were laminated using three times the planks, giving a final dimension of 60mm x 60mm.* The leg connectors were 900mm long, four of those, and 600mm long, four of those.* The doors were 60mm x 20mm to fit the opening.* The two shelves were cut from off-cut shelving from a previous project.
The lamination of the legs gave the opportunity to include the joint by cutting the various joints before lamination was done.
The other two were straight, with the middle one 60mm shorter.
The same cut-outs as the top were done for the bottom carriers. The dimensions were adapted to accommodate the height from the floor. Inserts were cut and glued in, to complete the bottom of the legs.
The lamination of the legs was done using a biscuit jointer. The accuracy and alignment during clamping was increased as it minimised movement of the individual planks.
The back and two sides were made using 3mm laminated plywood with a kiaat veneer on one side. These sheets were glued onto a 3mm high density Masonite. This was done to give strength to the sides and the Masonite inside was painted white.
The doors were manufactured using the same size wood as the structure. Mortise and tenon joints were used.
One of the biggest challenges was the glass doors. I have never done lead glass work before and it was important for me to have this feature in the cupboard. Luckily we live in the 21st century and have all the information we need on the Internet. I spent some hours reading the techniques and settled for the copper foil technique.
Jimnettes Arts and Crafts in Pretoria had everything I needed, plus valuable advice. The two doors fitted to the final project are my second and third attempt at lead glass soldering and the fourth and fifth attempt at cutting the pieces. I purchased the size glass required and then cut it into the eight pieces. They will not pass close scrutiny by an expert but are not bad for a novice. The glass was installed using the same technique as the side panels.
The granite top was ordered from Mammoth Granite in Boksburg and installed using tabletop clips and silicone to glue the granite to the wood structure. The bolts used were epoxied onto the granite.
The granite top was the final part of the project and seeing the final product was a satisfying experience.

The back and sides were made using 3mm laminated plywood with kiaat veneer on one side

The sheets where installed using 7mm square pieces of kiaat

The adjustable feet were salvaged from an old bed and were fitted using T-nuts in a recess

The doors were manufactured using the same size wood as the structure and put together with mortise and tenon joints

I had neatly put the sides together using mortise and tenon joints

This shows the middle put together between the two doors and the back

The glass was installed using the same technique as the side panels

This is how the bolts were attached to the granite with epoxy

This is how the middle section supports the granite
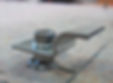
The complete nut set

The granite bolts attached to the structure

The complete unit

Final
